
Newsflash for all non farm/property owners, sometimes things break around the farm. Lots of times things don’t outright break so much as they slowly wear out. You can usually watch things wear out and if you’re smart, you’ll fix them before they do break. Better if you are not a chronic procrastinator like me and do routine maintenance on everything before it even gets to that point. If you are blessed to be one of those people, I am truly jealous and in awe of you for you are probably someone who never sees something break, because you don’t allow it get to that point. For the rest of us mere mortals, we fix things as we watch them fall apart.
If you are not mechanically inclined, or living with someone who is, you’re probably going to have a hard time on a farm. I don’t mean this to be an insult, it just means you’re going to probably have to hire and pay someone to do odds and ends jobs for you. I’m not like that. I can’t stand paying someone to do something that I (believe I) could just as easily do myself. Sure, it might take me ten times longer, it might even end up costing more in the long run, but at the same time, I learned a skill I didn’t have before. This is invaluable.
In this case, I have a Merrill Manufacturing C-1000 frost free hydrant that has never shut off completely correctly. You had to slam it down and in most cases it took a few times before it would seal correctly and quit leaking. The way these things work is that they have a long pipe buried in the ground, and the shutoff seal is actually made below the frost line. When you shut off the valve, the water in the tube slowly drains out the bottom into the ground and keeps the hydrant (aka faucet) from freezing up and breaking. It’s really a clever design. The problem is that there are rubber pieces that do fail over time. At the end of that shut off is a rubber stopper that apparently is the cause of 90% of shut off issues.
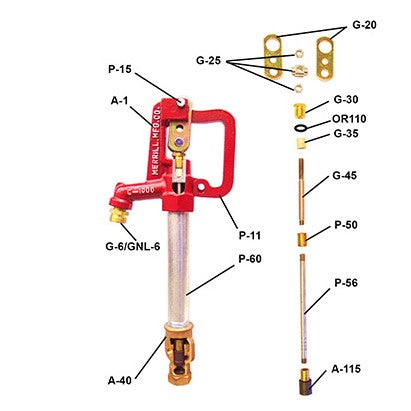
So as I have no experience with these things, off to YouTube I go. I found this really great video that explained how to take it all apart, even though it wasn’t the same make/model as mine. Close enough. Then it’s usually a good idea to visit the manufacturer’s website to see if there is any info on parts. Exploded views of systems are a great way to learn how things work and I was happy to find this:
OK, now that I know how it works and have a good feeling that this is a job I can tackle, time to order parts. Lucky for me Amazon had the exact replacement
parts all bundled into a kit.

Time to get to work.
Turn off the water to the hydrant you’re working on. In my case this meant turning off the water at the well pump for the entire house.
Find the biggest pipe wrenches you have. You will need one to hold the actual stand pipe and the other to turn the faucet. If you don’t hold the stand pipe, it’s liable to turn and cause issues where it’s connected underground. Don’t let the stand pipe turn.
Depending on how old your hydrant is and when the last time the head was removed, getting it off may take some doing. I tried some heavy duty rust buster that I sprayed up into the threads and let it soak. That didn’t work, it still wouldn’t come off. I then grabbed my small propane gas torch and heated up the head where the threads are. After about 5 minutes of that I was able to break the head loose from the stand pipe.
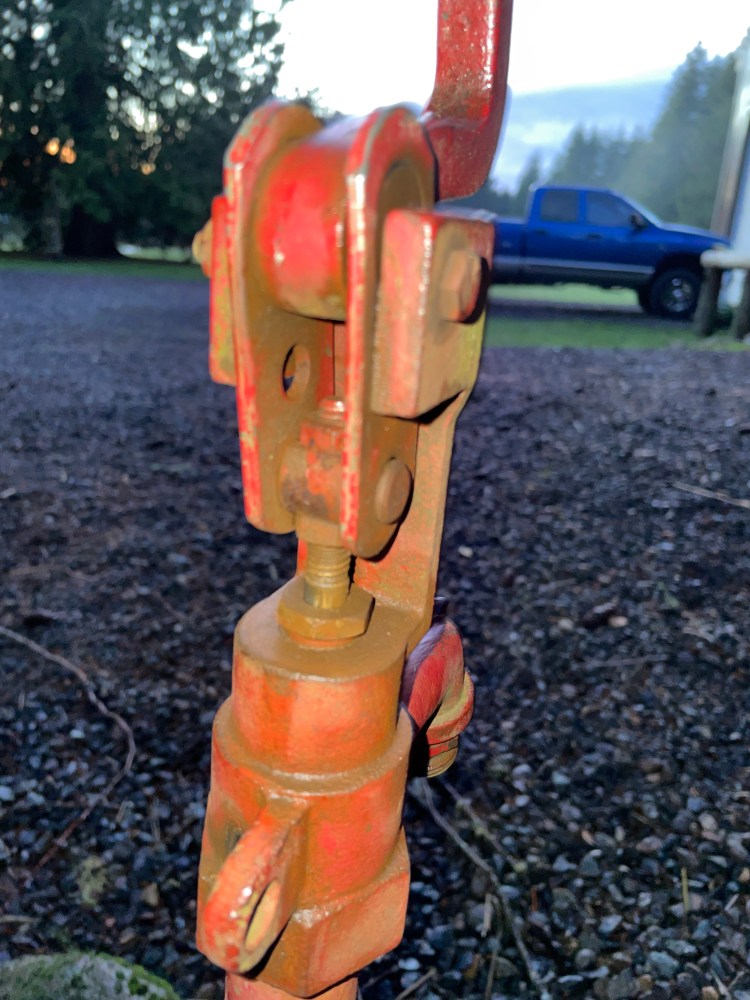
Pull the entire unit up and out of the pipe. You should have a long rod attached to the head and a rubber plunger at the bottom of the rod. Stick the faucet head in a vice on your workbench. Take a picture of the faucet at this point so you can put it all back together correctly.
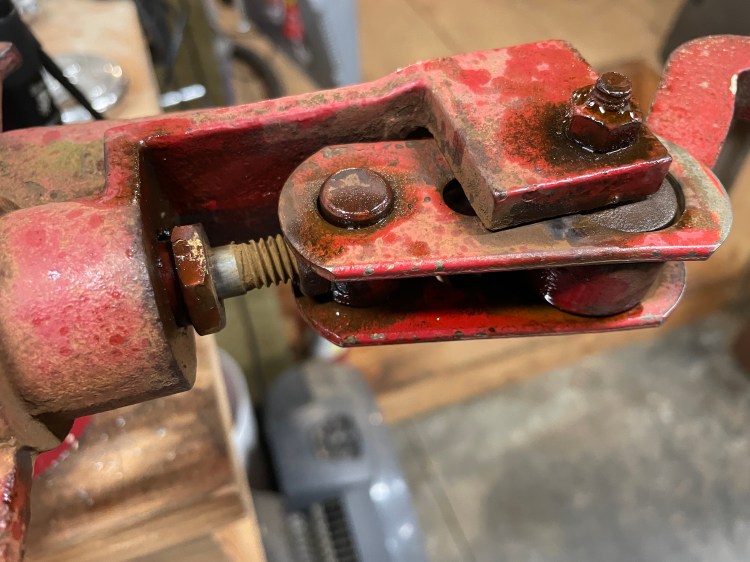
Disassemble everything. Rust penetrant, like what I use, is your friend here. Spray it on and let it soak. Remove the bolt holding the handle, the two side plates, the nut/swivel collar/nut (noting where on the threaded rod this is sitting so you can put the new parts back in the same place) and the packing nut. If you’re lucky, you’ll also be able to remove the o-ring and packing in one piece. Both my packing and o-ring had disintegrated so I had to dig out as much as I possibly could with a small screwdriver so that the new packing would have a clean surface to go into.
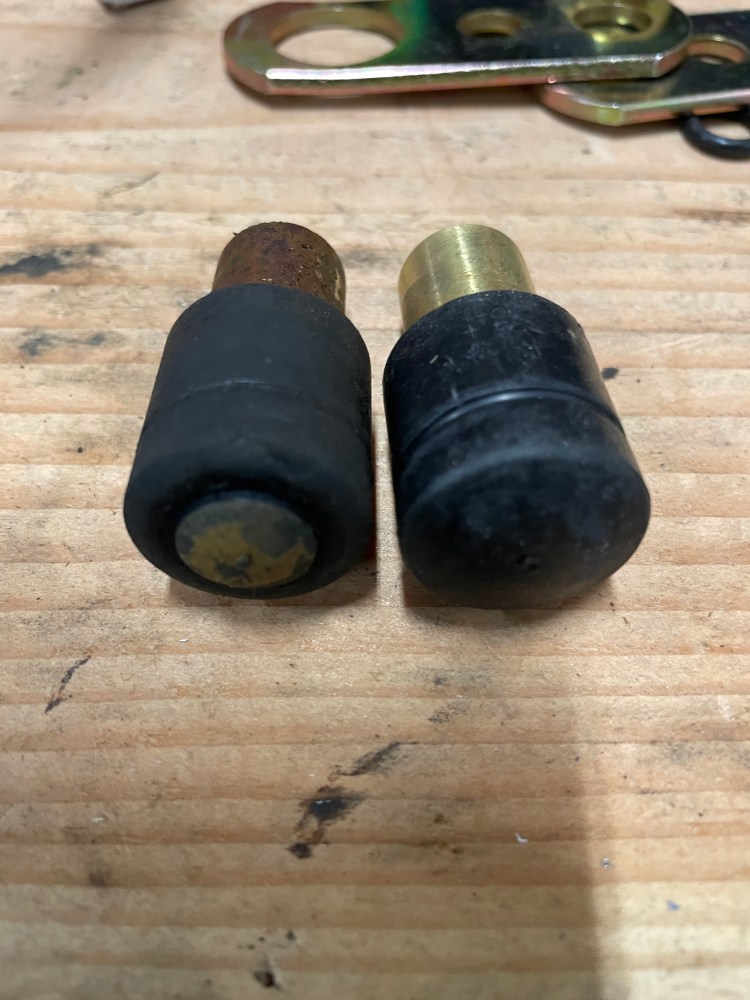
Remove the rubber plunger at the end of the rod, holding the rod with vice grip, unscrewing the plunger with your pipe wrench. Inspect everything as you take things apart. In the picture below you can clearly see where the rubber has worn away from the bottom of the plunger.
Clean all threads of rust and debris. You can use a wire brush, I used the wire wheel on my Dremel tool. Once all the threads are clean, coat them with anti-seize lube. Reassemble everything in the following order once the long rod is back in place through the hole in the faucet handle; packing, o-ring, packing nut, lock nut in same location it was, swivel collar, nut, side bars, bolt through handle.
Now take all this back out to your stand pipe. Slide the plunger and rod down into the stand pipe and make sure the handle is lifted up. Wrap the stand pipe threads with pipe tape and then thread the faucet head onto pipe. Try to tighten it up as tight as it was when you took it apart. Close the faucet, go turn the water back on to the hydrant and grab a large glass before heading back to your hydrant. Assuming all goes well, your hydrant shouldn’t be leaking.
For me, of course, all did not go well and it was leaking pretty heavily. So back to shut off the water to the whole house again. In my case, I needed to adjust the nut/swivel collar/nut combo up a few threads so that the plunger could move down more when the handle was closed. I was able to do all that without pulling the faucet head off, so that’s good. I closed the hydrant back up, turned the water to the house back on and bingo, no more leaks! Now when I move the handle up and down, it has a much more positive feel to it. When I close the faucet, it shuts the water off and I don’t have to repeatedly “jiggle the handle” to get it to stop leaking.
Now take the glass and fill it up slowly. Keeping the faucet nozzle in the water in the cup, close the faucet. If all is working correctly, you should have some suction that pulls water out of the cup and back into the stand pipe. Success!

So that’s it, a pretty easy job actually once you figure out the order things come off and go back together. I have another faucet that leaks a little and needs a rebuild, but that one doesn’t get used nearly as much as this one did, so I’ll put that off and buy two more rebuild kits, so I have a spare on hand.
If you have any questions, or would like to see a video of this rebuild process, let me know in the comments below and I’ll make that happen. Good luck if you’re tackling this on your own, and trust me, you can do it, assuming you have the strength, or friends to help you, get the faucet off the pipe!
Take care,
Joel
